http://www.youtube.com/watch?v=h0ZUFqs470c
Animation Principals
01. Staging
No staging or emphasizing was done
02. Squash and stretch
In my animation Squash and stretch was not implemented as unlike balls boxes do not flatten when gaining speed instead after images are seen.
03. Anticipation
For my animation I did not anticipated the vibration of the head of the Hep when lifting an object. Therefore, the Hep carries things too smoothly lacking realism in it's motions. But I did slow down the speed of it lifitng the box to show the "weight" of the box.
04. Straight ahead action and pose to pose
For this part i believe I did pretty well. Straight ahead action i used it when there is a need to use it. Like when the swivel base is moving there was not a need for any inbetweens for this animation.
On the other hand pose to pose was also used at the correct areas. For example, when the box get's transfered from one place to another on the conveyor belt, I made it vibrate inbetween the keyframes making it looks real as though the conveyor belt IS moving it from one place to another.
05. Follow through and overlapping actions
I believe follow through actions is follow up actions to make movement look real. I believe I did pretty well as I animated the robot in a way it is actually investigating the box by looking at it from top to down, pushing the box forward, knocking on the top of the box, looking at the box close up, giving a final quick check and finally nod it's head to give it a "It's a box" feeling before it carry the box to the platform.
06. Slow in and slow out
For this I slowed down my robot as it carries the box up. This is done to show the "weight" of the box. On the other hand, when it's going to reach out and grab the box it moves faster in comparison to it carrying the box.(It was not done to the extend of exaggeration as I did not want to make it look unreal).
07. Arcs
I believe this was done pretty well as it was quite simple. Although i did the longer way of turning my Swivel base.
08. Secondary action
I found this principle useful as when Hep was investigating the box there was a need to move his body continously with his head to give off the "he is inspecting" feeling.
09. Timing
In my animation I increase and decreased the frames needed to reach the next keyframe to give it a more smooth and better timing of the coordination of Hep's movements.
10. Exaggeration
There was no exaggeration implemented
11. Solid drawing
This was not implemented
12. Appeal
I believe there was not much appeal as there wasn't any exaggeration nor there was anything done to make it look appealing.
That's all for my IN3D blog and i strongly believe blogging isn't my thing after this....
Sunday, 21 August 2011
Friday, 5 August 2011
Storyboarding
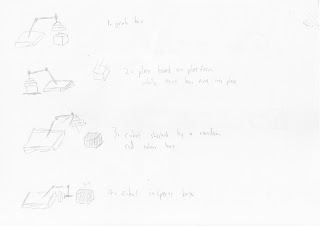
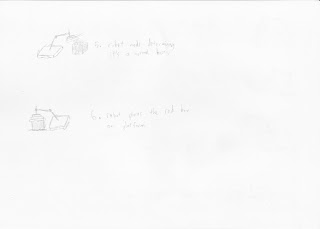
This is my story board with it's description beside it
Character
The character name is Hep. Day in and day out Hep has been constantly stacking boxes on the platform. Until one day.... a red box appears and Hep was shocked and did not know what he should do. Therefore, he began investigation! He investigated the box after many difficult proceedures.... Finally he nods and deceides that it is just a normal box and placed it on the platform after a quick last minute check/glance on the red suspicious box.
Sunday, 24 July 2011
IK Mech Arm
IK Mech Arm
For this exercise i have made use of the Parent constrain and used the 0 for false and 1 for true when it's true the cargo box will be parented to the Arm control and follow along once it's false it will be parented to the platform upon reaching there.
Sunday, 17 July 2011
Bouncing ball
Bouncing Ball
For this exercise i used the tangent weights to make a more realistic fall of the ball it stays in the air for a split second and drops. Aside from that i have also flatten the ball when needed to suggest the speed of the ball and the ball smashing onto the ground.
Monday, 11 July 2011
Ball Bounce Animation
In this picture it shows the ball on the peak of it's bounce. That's when the ball will slow down and i wanted to show this "slowed" down frame by added more beside it.
This is when the ball has the most of it's energy and is bouncing or moving at high speed. To show this i left more distance between the ball and the next frame to suggest the "fast" movement of the ball. I also made it abit flat around the edges to make it feel like it's moving at high speed.
This shows the ball at the end as it slows down and move frames of the ball slowly moving is needed
This picture shows the ball hitting the ground. When a ball hit's the ground it will slow down for a split second and flatten on the ground. To suggest this i did the exact same thing and added more frames to the ball as well as flattening it to the ground.
Friday, 10 June 2011
Research and Critique On Object
Research
I researched on approaching to make toys like my pink pig. I noticed a variaty of methods to approach and make soft toys. Most people usually use NURBS and control vertex to slowly form out the object by manipulating these points which gives a similiar effect as using a Polygons Object and moving its vertexs while activating Soft Select mode.
However, after trying out these methods i felt that it maybe a bit problematic to form out the main shape of my pig with just a NURBS sphere. Therefore, I deceided to try using a low subdivision Polygon sphere and move the vertex while pressing the shortcut key for smooth repeatedly. I found this method of mine pretty effecient in its own way as by moving the vertex's of a low subdivision sphere i am able to shape out the rough shape of my object quite fast. After shaping it would i would then manipulate it's vertex's to slowly enlarge the body or make it "fatter" at the place needed. One of the videos showing the usage of "control points" would be found here http://www.youtube.com/watch?v=wrwR1gzbTpc&feature=related
In conclusion, through my research i found out that there is no real shortcuts in making soft toys as soft toys is not a solid objects like I have been doing during class like a bucket or maybe even a gameboy. For soft toy objects there is a need to craft out the object slowly and surely bit by bit as soft toy's are technically different all round making it impossible to use shortcuts like using the polygon creation tool to make the thickness of the side of a bucket and using revolve to shape it out.
Critique on my own creation
Even though I researched on how most people shape soft toy the biggest mistake I ever made was the head for my pink pig due to my lack of foresight. The shape of the head of my 3D pig is quite different from my soft toy, my soft toy's head is more "compressed" from the nose to the neck and the head is pushed backwards quite abit. I attempted to fix it up, but since my head and body was two parts i had to merge the vertexs togather and by merging them the form of the head would stretch out and change. In addition, my pig's head is rounded with alot of vertexs making it is extremely difficult to move it around to fix.
However, I do believe a there is a better way around this compare to my own method of doing things. For example, using NURBS for my toy may have been able fix this problem as NURBS have the ability to move using control vertex without affected the whole object unlike what Soft Selection mode does. Therefore, by using nurbs to move and manipulate the object part by part there is a chance I would have been able to shape my pig's head correctly.
Aside from my biggest mistake, another inevitable mistake I believe I did would definately be the tail. The mistake itself was inevitable as there was a bug with maya which did not allow me to use difference to form the hole for the tail to fit in nicely. Furthermore, by using difference the pig and the tail as a whole would disappear from MAYA itself. Therefore, i had to delete a face of the bottom of the pig and moved the vertex disrupting the vertexs of my pig in a unnatural way. I also believe there may have been another way around this if I had consulted my teacher about it.
Another mistake I did would definately be the cheeks of the pig. Since my pig is a furry object the cheeks is pretty furry itself and it follow the shape of the pig's head. I attempted to give a similar effect by starting with a cylinder and slowly manipulating it's vertex's to fit the shape of the pig's face. After matching the shape of the face i made use of the extra outter vertex's to maintain the shape of the face and merge in a "flattened" semi-circle to give the cheek it's puffy looks. Even though i manage to give off a similiar effect it was not satisfying.
The last and final mistake I believe would be the ears of my pig. Like the cheeks I attempted to make a similiar effect and i did. However, I managed to make ears that resembles just tiny bit of the actual ears but the results were definately not satisfying.
All in all I believe my object was poorly made with my lack of foresight and experience for many things. Even though yes my 3D pig figure does have charateristics that make's it resemble the original pig toy but it lacks the many tiny details to make it look 100% similiar to it.
Pink Pig Complete
Pig Tail
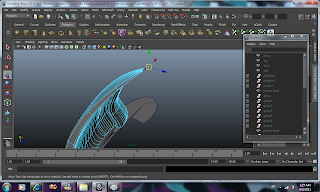
For the pig's tail i deceided to use a Helix and i reduced the number of curves it will make into 1. After doing so i started to use vertext mode and slowly pushed it in section by section and finally Smoothen it to make it look something like the original pig's tail.
Full Combined Pink pig
In order to combine all the parts togather like the tail and ear. I still had to delete the faces of the pig rather then using difference as if i used difference the whole pig plus the tail or ear will be deleted togather. Therefore, i deleted the faces and slowly used the "Merge to center" function and piece them togather bit by bit. Furthermore, the problem of being unable to use difference greatly effected the merging of the tail as i had move the tail into place and this disrupts the edges of the bottom of the pig. In addition, i also added bevel to the sides of the legs of the pig to prevent it from looking too deformed when smoothened.
Completed Pink Pig with texture
In order to finish the pig with texture i first placed a base pink fur texture all over the pig and used face mode to slowly patch up the places that need to be white. I also made use of UV Screenshot to take down the positions I need to manually add patterns too like the nose of the pig for instance.
Wednesday, 8 June 2011
IN3D Assignment: Pink Pig Progression 2
Pig Head
Like the body i started with a low 6 division sphere and slowly crafted it vertex by vertex until i got the shape of the head out. Afterward i just used a the cylinder and cutted them accordingly. After finishing i created holes for the cheeks using face mode as the difference function for some reason had problems and deleted the whole head and the cheek that is being selected togather.
Pig Cheek
My Pig's cheek puffed out following the shape of the figure. So in order to try and attain the same effect i used vertex mode and pushed the inner vertex in afterwards i clicked on the vertex around the edges of the cheek and bent them in a way it is somewhere close to the figure of the pig. After doing this, i merged the vertex that i pushed in and one of the outter vertex of the cheek by the "Merge to center" function. By pushing in the inner vertex and moving the outter vertex i am trying to preserve the figure of the pigs face by prevent the inner vertex more moving much. However, to make the cheecks "puff" out i had to merge them togather.
Pig Cheek V2
Upon completing my pig i realised the cheek lacked it's circular shape and i attempted to fix it. My attempt was a great success and my pig looked much better then expected. I first created a 6 sub division polygon sphere and splitted it into two. Afterwards, I smoothen it and slowly "compress" its side width wise to make look less puffy. After im done reducing it's puffy look I merged the cheek onto the pig. Upon merging it was still to puffy and I furthur reduce it through manipulating its vertexs
Pig Head 2
After the cheek was done, i used face mode to cut a hole for the nose and merged the vertex togather. For the eyes i wanted to give it the feeling that it is pushed into the toy like my original toy is, so i used face mode and pushed in a portion of the pig's head where im going to place the eyes. After pushing the faces in i used number 3 to add the smoothening effect. Once i done that i created holes using face mode and merged the eyes and the head using "Merge to center".
Pig Ears
For the ears i used the polygon too to shape the base of the ear. After i was done i used CV curve tool to create a curve for the polygon to be extruded too. I also reduced the tapering to 0, in order to, give it a sharp end effect. After I extruded I moved the vertex of the CV curve around to make the ear curl downwards in a smooth manner. I also played around witht he vertex of the ear to slowly form the pig's ear.
Friday, 3 June 2011
IN3D Assignment: Pink Pig Progression 1
Pig Body
I started out with a circle and lowered the subdivision un order to model my pig's main body. With my Pig in hand i kept referring to it as I moved the vertext to match its shape. While moving the vertex I could not determine whether it looks like my Pig's main body or not due to its hard edges so I kept smoothing out the low subdivision circle as I moved the vertex around in order to match my pig as much as I could. Upon matching the shape I began matching it's size like certain parts need to be "fatter" and certain parts need to be "slimmed down"
Pig's Legs
This was done simply by using a low subdivision circle and a triangle. I used face mode to delete the bottom part of the triangle and half of the circle. Once i was done i moved them close to each other leaving a tiny gap and started using Merge Vertex to center.
Pig's Body With Legs
Upon completeing the shape of the body and legs i moved on to merge them togather. Like what I did with the Pig's leg I used face mode and made holes for the legs to fit in. Furthermore, in order to make it more toy-like I deceided to make some space inbetween the leg and body so I used the "Edge Loop Tool" and made an edge to cut off the sharp point of the leg and began using Merge Vertex to center to merge them togather.
Friday, 20 May 2011
Assignment 1 Sketchs
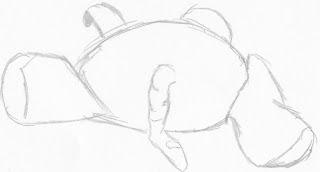
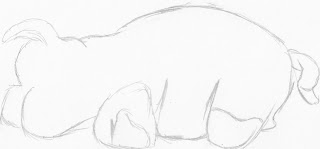
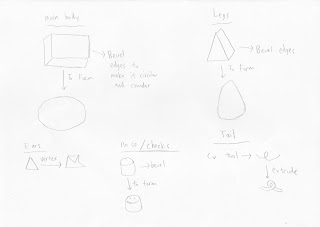
Pink Pig
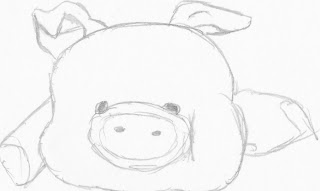
As u can see i will be doing this Pink Coloured Pig. It will be created by Bevelling many shapes which consist of a Cylinder, Triangle and Cube.
Storyline: The mouse will ignite his first gear and start moving around the race track and zooming around happily. But to his dismay he will soon find out that the track is actually incomplete! Being unable to stop in time he flys our of the track as he prepares his death by eating a cheese found inside his car. But he will then be saved as land on this pink coloured pig. From then onwards, the pink pig became the rat's most respected item!
Wednesday, 18 May 2011
Week 3: Washboard
Week 3: Tracks
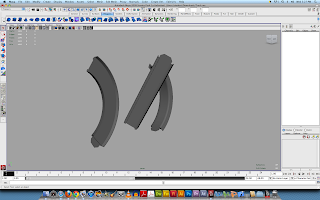
Tracks
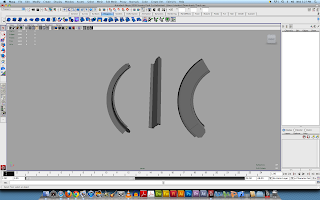
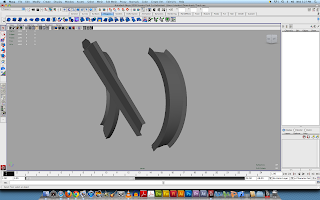
I had some minor problems with the modeling of the track here and there, but in all it was quite an easy model to create. Upon completing the exercise and rotated the object according to the instructions i found it intriguing as by rotating the shape and form of the track changes to another different type of track that can be used to combine with each other to form a full track. I found it fun and played around with the rotation and i had a total of 3 different tracks after playing with the rotation for awhile.
Subscribe to:
Comments (Atom)


